Saturday, September 24, 2011
Second week: School wide recycled cardboard releif
Here's how my brain works:
I need a project for our yearly county-wide recycled art contest.... I need a project that includes everyone, unlike last year where I waited too long and could only get my kinders and 3rd graders done in time...I have 585 students, how am I going to get them all involved???!!!....Aha, thank you, Google images!......Here we go!
My students are now spending 1 class period and learning about reliefs by cutting out and painting 1 piece of cardboard that will then be assembled to create a giant school-wide relief sculpture.
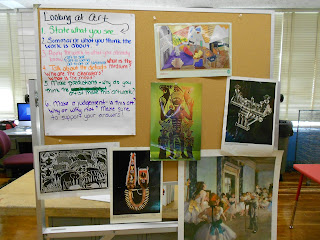
Looking At Art
Here are the guidelines I have posted in my room for viewing and discussing art. I referenced them in my previous post.
1. State what you see.
2. Summarize what the work is about.
3. Apply the work to what you already know: Make art to self, art to world, and/or art to art or literature connections.
4. Talk about the details: Who are the characters, what is the medium, what is the mood? 5. Make predictions: Why do you think the artist made this work?
6. Make a judgement: Is this art, why or why not? Make sure to support your answers!
By the way, I feel the need to preface the fact that the poster I have hung in the room at all times is a much a neater one I had done with the computer, and it has a few more details in each statement than the one above, but I had written and hung this one closer to the SB when the students were being introduced to it.
If some of it seems familiar it is. Certain ideas I take from ELA general education classroom strategies (#3 and 4). And the list in it's entirety is tied into Bloom's Taxonomy, where I try to hit most of the benchmarks he defines in his learning process.
Friday, September 9, 2011
First Week Lesson
This year my personal goal is to really get my students to analyze and discuss works of art. So I decided to start the first art class of the year with an activity where we talk about different things to think about when looking at artworks. Throughout the 40 minute period, I explain the classroom rules and procedures. I'm always amazed at what the students notice and find connections to. I do this lesson with 1st through 5th grade. Here's how it goes:
1. I greet the students at the door and tell them that they can chose their own seats but they have to sit 2 boys and 2 girls to a table.
2. After they come in and sit down I show them where the table numbers are and have them call out their names while I write them in on my seating chart.
3. I ask them how we should transition from place to place in the classroom and discuss some expectations for that apply not only in the art room but throughout the school. Then I have them move from their tables to the front where I have my Smartboard.
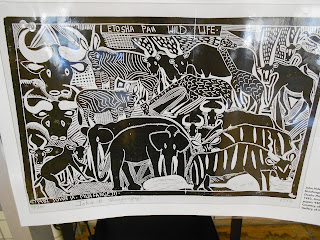
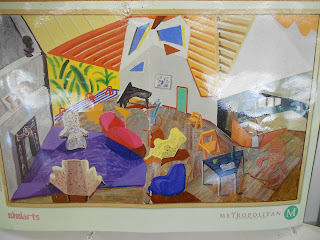
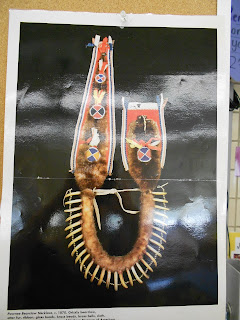
4. Posted up I have various art images and a list of 6 things students can think about when they look at art. As a class we read the list together and I answer any questions and clarify any confusion.
5. After that, I explain that the average person looks at a work of art for 3-5 seconds and then I use a student to help show the class how quick that is. I let them look at the work for 4 seconds and then ask them if they were able to look at and remember any of the details about the work. Which of course they can't, so then I explain to them how important simply looking at work is, and we take a silent 20 seconds to view the art that is hung up.
6. We then spend a few minutes discussing what they notice, and as they share their ideas I make connections to the list. For instance, If a student says, " I see a bunch of people and a dog in this picture", I would reply, "good, that would be number 1 on our list, making observations and stating what you see".
7. After we discuss, I give them a drawing assignment where they must take something from either 1 or a combination of the images and create their own picture using the image/s as inspiration. I explain inspiration as being the process where we view and discuss artworks and then generate ideas about how we can use what we've learned in our own artwork.
8. They transition back to their tables, work for a bit, then transition back to the floor. While they are working I stop them once, by using my chime, and explain my non-verbal ART volume sign. The sign works like a '3 strikes you're out' rule. If the class gets too loud I remove a letter, then if needed, a second, and finally, if needed I remove the 't' and then the rest of the class period is silent work time.
9. When the children come back to the front I have them come up one at a time and hold up their work. The student chooses someone with their hand raised sitting quietly to guess which artwork was the inspiration for their drawing. I do this until the end of the period and then I have them line up!
It's amazing what they can do! :)
(below are examples from 4th grade)
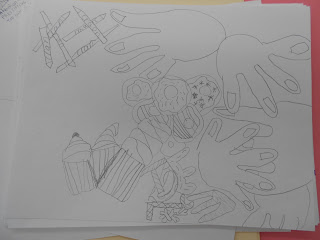
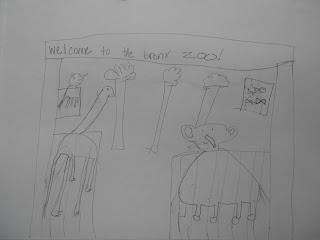
Can you guess which drawing was inspired by which artwork?
1. I greet the students at the door and tell them that they can chose their own seats but they have to sit 2 boys and 2 girls to a table.
2. After they come in and sit down I show them where the table numbers are and have them call out their names while I write them in on my seating chart.
3. I ask them how we should transition from place to place in the classroom and discuss some expectations for that apply not only in the art room but throughout the school. Then I have them move from their tables to the front where I have my Smartboard.
4. Posted up I have various art images and a list of 6 things students can think about when they look at art. As a class we read the list together and I answer any questions and clarify any confusion.
5. After that, I explain that the average person looks at a work of art for 3-5 seconds and then I use a student to help show the class how quick that is. I let them look at the work for 4 seconds and then ask them if they were able to look at and remember any of the details about the work. Which of course they can't, so then I explain to them how important simply looking at work is, and we take a silent 20 seconds to view the art that is hung up.
6. We then spend a few minutes discussing what they notice, and as they share their ideas I make connections to the list. For instance, If a student says, " I see a bunch of people and a dog in this picture", I would reply, "good, that would be number 1 on our list, making observations and stating what you see".
7. After we discuss, I give them a drawing assignment where they must take something from either 1 or a combination of the images and create their own picture using the image/s as inspiration. I explain inspiration as being the process where we view and discuss artworks and then generate ideas about how we can use what we've learned in our own artwork.
8. They transition back to their tables, work for a bit, then transition back to the floor. While they are working I stop them once, by using my chime, and explain my non-verbal ART volume sign. The sign works like a '3 strikes you're out' rule. If the class gets too loud I remove a letter, then if needed, a second, and finally, if needed I remove the 't' and then the rest of the class period is silent work time.
9. When the children come back to the front I have them come up one at a time and hold up their work. The student chooses someone with their hand raised sitting quietly to guess which artwork was the inspiration for their drawing. I do this until the end of the period and then I have them line up!
It's amazing what they can do! :)
(below are examples from 4th grade)
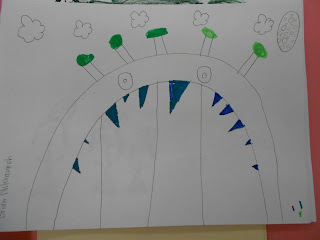
Can you guess which drawing was inspired by which artwork?
Wednesday, September 7, 2011
3rd Grade Laurel Burch Cats
I've seen this lesson before done in a bunch of different places. So I thought I'd try it out.
Needless to say, just like on the sites I had seen the lesson on...they came out adorable. Laurel Burch herself has a very interesting life story and her art is really child-friendly. It has all the things I love in art, pattern, design, and color! :)
Some of website and blogs that have had this lesson or a variation on it are:
Dream Draw Create
Kids Artists
WKE Art Smarts
Mary Making
Monday, September 5, 2011
Bulletin board for 2nd grade printed birds
This is the board that I had done at the end of last year. I loved the way this lesson came out and the originality of the birds is wonderful. Plus, it coincided with a unit the second graders did on birds in their science class. The original post is here
Sunday, September 4, 2011
Front bulletin board
This year my lobby bulletin board was inspired by an image I found off Google from the kinderart website. The red board is the original image and the blue board is my version. I wanted a brighter color better than the red. :)
Subscribe to:
Posts (Atom)