
I got my class set of ipads on Thursday which is the second to last
of my 2 remaining 6-day cycles. These aren't my ipads to keep, they are
loaner ipads I reserved and signed out...Best decision EVER. The last
two weeks of school are PERFECT for ipads in the artroom, especially
because:
a) the kids are, tired, antsy, aching for summer break, and need something different to keep them engaged
b) setup and cleanup is super easy which frees up some time for me to get my room ready for the end of the year
c) its a great review tool to help go over all the things we've learned throughout the year
d)
its a great time for me to experiment and try different things with
them because this time of the year it's a little less hectic for me
e)
My art room gets HOT with no air conditioning and this doesn't require
me to be running around the room quite as much as switching and prepping
for all different materials throughout the day.
But i
digress.....getting back to the actual use of the ipads. Thus far I
have use them in 2 lessons. The first lesson is a contour line drawing
activity where students do 3 continuous contour line drawings of their
sneaker. The first drawing is 1 minute, the second is a 2 minute, and
the last is a 5 minute. During the drawings there is no talking and at
the end students walk around to view each others work. Then as a class
we sit together and look at a few to discuss. We also discuss the
importance of practice sketching and why and how continuous line
drawings would be beneficial to do as artists. The apps I used were:
'Paper'

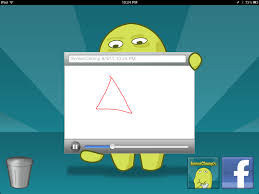
'Screen Chomp'
'DoodleBuddy'

All
of which are basic sketching/drawing apps with simple to use tools and a
simple menu bar of options. 'Screen chomp' lets you record your
drawing while you do it so students can view their own drawing or the
drawings of others come to life after they've been completed.
The
second lesson I've done is connected to the artist Arcimboldo. We view
and discuss his paintings and why an artist would want to create
portraits like these instead of the traditional realistic portraits. For
that lesson I used 'Faces iMake' which I highly recommend. It's fun,
engaging, interesting, and the variations are endless.
I've got a few other lessons and apps I plan on trying out so I'll be updating with more ideas soon!


.JPG)
.JPG)
.JPG)


.JPG)
.JPG)
.JPG)

.JPG)
.JPG)
.JPG)


